
How to: take Leaf Cuttings from Pelargoniums
Posted:3 May 2015
Once you start propagating plants, it’s very easy to get obsessed. No prunings or trimmings are thrown away. No seed-head is left unharvested. No random seedlings are pulled out (unless they are definitely weeds). They all hold the possibility of more plants for free – what could be better?
So if you are mad about propagating, like I am, you might want to try out this rather unusual method with Pelargoniums. It is useful if you haven’t got much cutting material to work with or you want to make lots of identical plantsthough it may take a while.
I came across this propagation method while watching Monty Don on BBC Gardeners World. Monty was taking early autumn cuttings of Scented Pelargoniums as “insurance” in case the original plants did not come through the winter. The same method can be used when cutting back lanky spring growth to make shapely plants or really at any point when they are growing strongly. Obsessive propagators will try any method at any time, just in case it works! Nothing ventured, nothing gained, and it can be surprising what succeeds against the odds.
The usual way of propagating Pelargoniums is to take softwood tip cuttings, fairly short, using the flexible newest bit of the shoot. To do this some of the lower leaves are stripped away. But these leaves will also make further cuttings. You just need to make sure they have a tiny section of stem material left at the base, which provides the cells for a new plant, so pull them carefully off the stem.
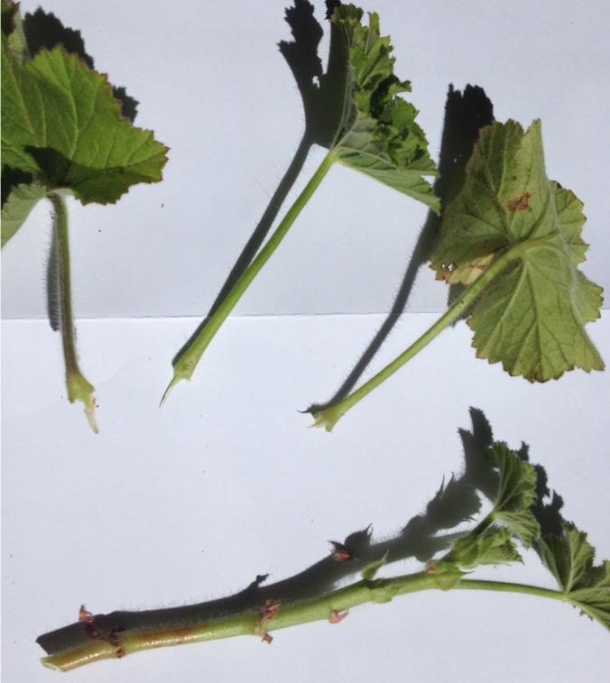
Image above: 2 leaves with stem material stripped from tip cutting (bottom)
Place them in a pot of free-draining compost, around the edge between the compost and the side of the pot.
Snip back some of the leaf area (maybe half) so that the cutting doesn’t lose too much moisture before it can make roots.
Water in, and put a small plastic bag or a propagator lid over the top for this first stage.
If using a plastic bag, make sure it isn’t touching the leaves and has plenty of air in it. (I haven’t used a heated propagator for this method but it might speed things up a bit.)
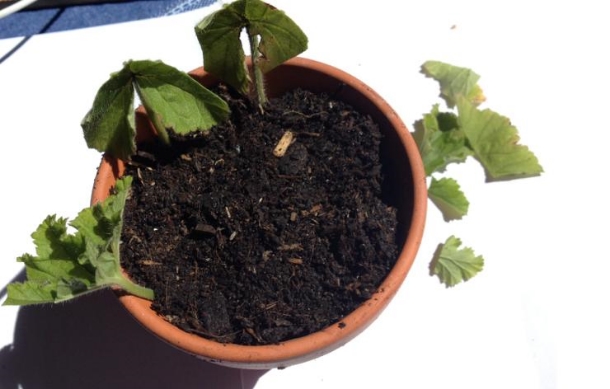
Image above: Cuttings in pot after having leaves snipped back to reduce transpiration
Periodically check that they are not getting too dry, or too moist, when disease might take hold. Remove any cuttings that are clearly failing.
Leaf cuttings will make roots in the normal way. Give them a gentle pull – if they resist, roots are forming. Pot them on individually when they have rooted. They seem slower than tip cuttings to show signs of top growth, so have patience. They will throw up new growth from under the soil at the base of the leaf stem – that’s when you know you’ve succeeded. Amazing: this is a new plant from a leaf you would normally have discarded when preparing a tip cutting.
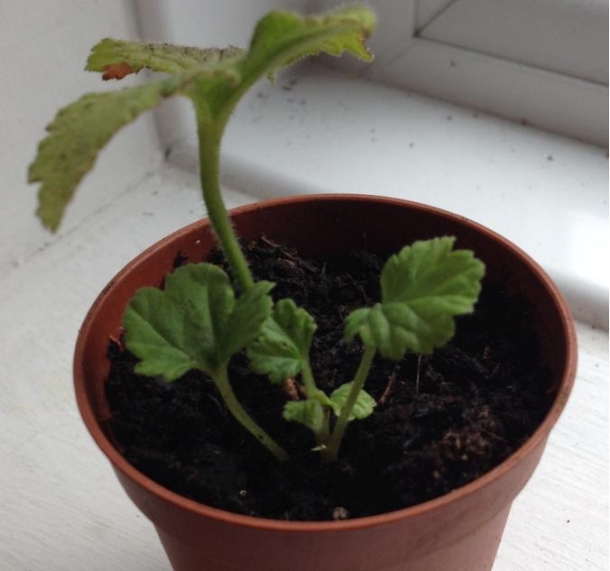
Image above: Successful leaf cutting from Pelargonium ‘Charity’
Words by Garden House friend Julia Widdows