
Julias Propagation Notebook: part 1
Posted:10 December 2017
Julia Widdows is a great Garden House friend who has volunteered to write a regular notebook on the fascinating subject of propogation (thank you Julia!). This is an area of horticulture that we just love not only does it involve tracking the whole cycle of plant development, from seed or cutting etc but also it means we can make many many new plants, for the garden here, and to give away or grow on and sell. Its a hugely fascinating side of gardening, and something that we focus on also in our workshops coming up in January: Plantspersonship: 8-session course
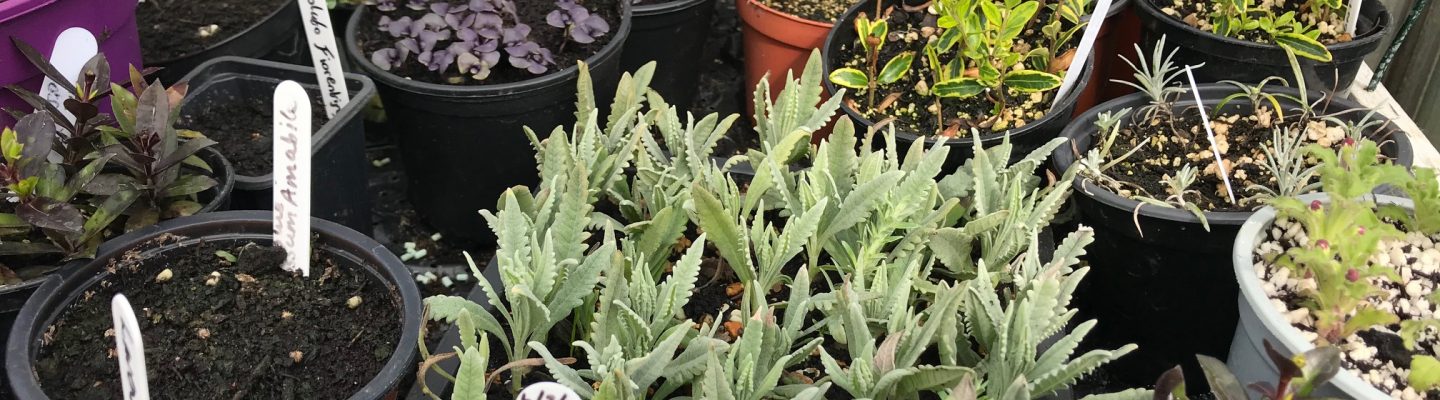
Julia: “Theres still time (just) to take cuttings of shrubby Salvias, as some of them are vulnerable to winter weather. You will need a heated propagator, or conservatory, greenhouse or sunny windowsill where night temperatures dont drop too low. The heated propagation unit in the greenhouse is up and running again, giving us lots of space for making new plants for free!
A month ago the Salvias were all busy flowering their heads off here in the Garden House. But since then, in the mostly mild autumn weather, theyve made lots more side shoots perfect for cuttings.
Take these shoots and cut cleanly just below a node (where the pairs of leaves sprout). Use only the top, flexible parts of the stems, rather than the woody sections, as these are more likely to give results. One thing Ive learned from Bridge is that you can have success with really short cuttings even the top 3-5 centimetres of a shoot.
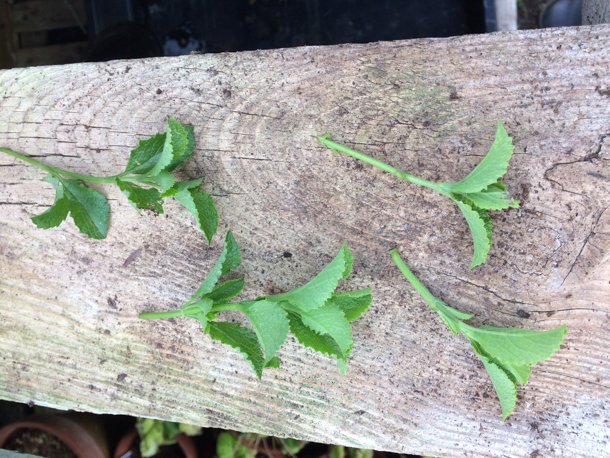 Cuttings, before and after preparation
Strip the bottom few leaves carefully as you dont want any of this below soil level and rotting off. Leaves will lose water, and as there are no roots yet, leaving too much leaf will stress the cutting. Soft leaves that are not waxy or hairy will be most vulnerable to water-loss. For the same reason I often trim the larger remaining leaves by half. It looks odd, but if the cutting takes, new growth will soon make up for it.
Insert cuttings into a fairly shallow pot of well-drained compost, spacing them out round the edge of the pot. I used a multi-purpose with some sand stirred in. You could also use multi-compost with a little Perlite or a proprietary cuttings mix. Salvias do not want to sit about in heavy or waterlogged compost or any pot too deep. They need a bit of room and air between cuttings to prevent tops rotting, too, at this time of year. And gently firm the soil; tuck them in like babies cuttings shouldnt wallow about in loose compost with air pockets. Dont forget to label them. I took cuttings of S. African Skies (pale blue), S. Amistad (deep purple) and an unnamed one with vidid red tubular flowers.
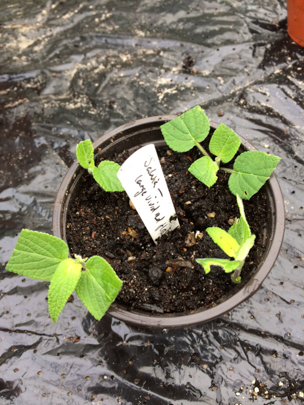
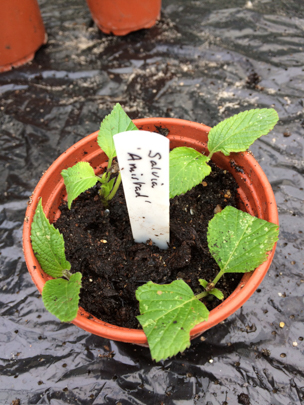 Labelled and ready
Water, let the water drain through, and put them over some base warmth. I put a clear lid over our cuttings on the heated unit to keep them a bit cosier for the first few days (see top image). You can use a clear plastic bag over individual pots to keep draughts out and moisture in, but do check each day to make sure theyre not soggy.
Fingers crossed for new roots growing in a few weeks time.”